How to Control GPU Fan Speed for NVIDIA & AMD
Most graphic cards (GPU) nowadays have something called Thermal Design Power (TDP) which essentially limits the level of performance output when the card reaches a certain temperature. In other words, an overheated GPU won’t give you the highest theoretical performance
To solve this, try to lower the thermostat, clean the computer from dust, and adding more fans into the system. Furthermore, increasing the GPU fan speed could also significantly makes it cooler.
#1 First, download and install MSI Afterburner
In case you haven’t heard, MSI Afterburner is a free tool to access some advanced configurations on a GPU, mainly for overclocking. Despite being entitled to a specific brand, the tool can work well on all GPU manufacturers. It is also the reason why MSI Afterburner is so universally adopted.
You can download MSI Afterburner here, and then install it onto your machine. After that, hop on and follow these steps.
1. Run MSI Afterburner and click the Settings icon.

2. Navigate to the Fan tab, then tick Enable user defined software automatic fan control.

3. Add or move nodes based on your preferred fan speed settings

4. Click Apply. Don’t close the window yet.

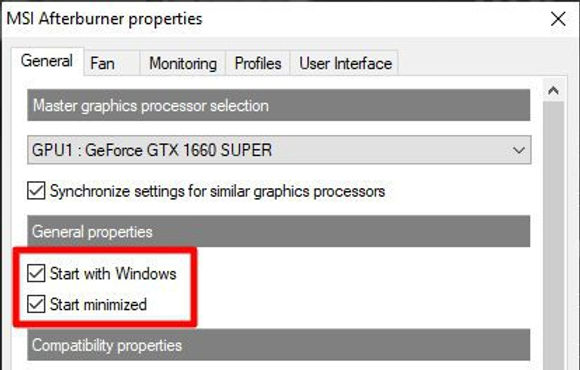
5. Go to General, tick both Start with Windows and Start minimized. This will ensure the fan setting is applied at startup.

6. Finally, click Apply, then OK

